Intro to Jetpack Compose Navigation

Update: This article was written before compose-navigation reached alpha01 and has been not updated since to reflect the changes in alpha01.
Update 2: I strongly recommend following the official Jetpack Compose Navigation codelab instead of following this article.
Last year, the Android team at Google announced Jetpack Compose. Since then, it has been seeing lots of updates; dev releases, and starting a few months ago, alpha releases with lots of great samples. Many of the sample apps implemented their own Navigation logic and many people wondered, what will be the official way to deal with navigation within Jetpack Compose, until now (or soon enough). The Jetpack Navigation library is about to reach its first release 🙌🏽
This is Part 1 of a 2-part article about Jetpack Compose Navigation. Click here for Part 2.
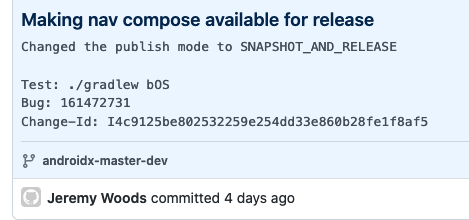
Figure 1 - Jetpack Compose Navigation alpha release is coming soon!
- Why should I use this?
- Getting Started
- Creating a simple Nav Graph
- How can I update the TopAppBar title?
- GitHub repository
- Conclusion
Why should I use this?
Besides being the official solution, the Jetpack Navigation library uses the androidx navigation library. If you like the androidx navigation library, you’ll probably feel some familiarity while using this. Of course, if your own implementation or some other library works for you, keep using it! These are all just tools to make development easier and we should use what we think is best for the job.
Getting Started
How can you get your hands on this shiny piece of code and use it in your Jetpack Compose project?
From the androidx.dev maven repository where the Android team releases snapshots!
In your root
build.gradlefile, add:allprojects { repositories { // .. existing repositories maven { url = 'https://androidx.dev/snapshots/builds/[buildId]/artifacts/repository' } } }- Replace
[buildId]with the latest build ID from https://androidx.dev/snapshots/builds. This post usesbuildId = 6916278. In the
dependenciesblock of your app’sbuild.gradlefile, add:implementation "androidx.navigation:navigation-compose:1.0.0-SNAPSHOT"
Creating a simple Nav Graph
It’s very simple to implement a simple hierarchical navigation where there is only one backstack and the whole application is within this backstack. First, we create our own NavController using rememberNavController(). After that, we can create a NavHost instance with two screens called Profile and Dashboard. Since we will navigate from Profile -> Dashboard after this, let’s pass our navController to the Profile Composable.
@Composable
fun SimpleNav() {
  val navController = rememberNavController()
  NavHost(navController, startDestination = "Profile") { // this: NavGraphBuilder
    composable("Profile") {
      Profile(navController)
    }
    composable("Dashboard") {
      Dashboard()
    }
  }
}
You don’t have to use a String for the Composable id inside the NavGraphBuilder. You can use any type.
We’re using the NavGraphBuilder instance, provided by the NavHost Composable and the composable extension function to add destinations to the NavGraph. We have to pass the navController to any Composables that need use it.
Navigating within the NavGraph
Let’s add navigation from Profile → Dashboard using a Button:
@Composable
fun Profile(navController: NavController) {
  Column(modifier = Modifier.fillMaxSize().then(Modifier.padding(8.dp))) {
    Text(text = Screen.Profile.title)
    Button(
      onClick = { navController.navigate("Dashboard") },
    ) {
      Text("Open Dashboard")
    }
  }
}
The Result
Figure 2 - Simple navigation with config changes and process death
What about the backstack?
All of that is automatically handled already through the androidx Navigation library that this library uses. When your user presses the back button on the Dashboard screen, they’re going to be taken to the Profile screen.
Can I provide arguments for the destination?
Absolutely! Instead of calling navigate("Dashboard"), just pass a bundle of arguments like this:
navController.navigate("Dashboard", bundleOf("title" to "My Dashboard Title"))
Then, in our NavGraphBuilder, we can access these arguments through backStackEntry and pass them on to the Composable.
@Composable
fun SimpleNav() {
  val navController = rememberNavController()
  NavHost(navController, startDestination = "Profile") { // this: NavGraphBuilder
    // .. other composables
    composable("Dashboard") { backStackEntry ->
      Dashboard(
        title = backStackEntry.arguments?.get("title") as String
      )
    }
  }
}
Figure 3 - NavArgs support coming soon!
Do I need to do anything to survive process death?
Not at all! As the video shows, process death support comes built-in and we don’t need to do anything further for simple hierarchies. However, as we will see in the BottomNavigation example in part 2, there are some caveats when we need to manually save and restore the NavHost state.
How can I update the TopAppBar title?
navController.currentBackStackEntryAsState() allows us to observe the state of the current backstack entry, so when we use it to set the title of TopAppBar, it will automatically update when the current backstack entry changes. Here’s what that looks like in code:
@Composable
private fun FunComposeApp() {
  val navController = rememberNavController()
  val currentScreen by navController.currentBackStackEntryAsState()

  Scaffold(
    topBar = {
      TopAppBar(
        title = {
          Text(currentScreen?.destination?.id.toString())
        }
      )
    },
    bodyContent = {
      NavHost(
        navController = navController,
        startDestination = "Profile"
      ) { // this: NavGraphBuilder
        composable("Profile") {
          Profile(navController)
        }
        composable("Dashboard") {
          Dashboard()
        }
      }
    }
  )
}
Here’s how it looks like on the device:
Figure 4 - Basic Navigation with TopAppBar but wrong title
Why is there a number in the TopAppBar?
That is because currentScreen?.destination?.id.toString() doesn’t actually return the destinationId that we provide to navController.navigate(). Internally, the navigate() function uses the hashCode of that string + an initial ID of 0x00010000.
We’ll use this ID to determine which screen is being displayed, then use that to set the title. Let’s define our screens now:
sealed class Screen(val title: String) {
  object Profile : Screen("Profile")
  object Dashboard : Screen("Dashboard")

/**
 * hack to generate the same Destination ID that
 * the Compose Navigation lib generates
 **/
  val id: Int
    get() {
      return title.hashCode() + 0x00010000
    }
}

fun NavDestination.toScreen(): Screen {
  return when (id) {
    Screen.Profile.id -> Screen.Profile
    Screen.Dashboard.id -> Screen.Dashboard
    else -> Screen.Profile
  }
}
Now, let’s get the screen title from the NavDestination by using this in our TopAppBar title instead:
TopAppBar(
  title = {
    Text(current?.destination?.toScreen()?.title ?: "")
  }
)
The Result
Basic Nav with a TopAppBar code on GitHub
Figure 5 - Basic Navigation with TopAppBar with the correct title
GitHub repository
All of the code discussed in this blog post is available here:
https://github.com/AfzalivE/Fun-Compose
Conclusion
I think Jetpack Navigation is going to simplify navigation code for a lot of people. Like all things in Compose, it is simple to use in most cases. In part 2, we’re going to create multiple navigation graphs in a Bottom Navigation-based UI.
Found this article interesting, or better yet, found a bug in the article? Please comment and let me know!
Thanks to the Compose Navigation samples by the Androidx Team, and thanks to Neal Manaktola for reviewing this article.